This Halloween I really wanted to transform myself with make-up, so Naveed and I decided to take on the role of a demented plastic surgeon, and his tortured/mutilated patient.

 I took on the role of the patient, a bruised up, blood-stained, disfigured patient. I used absolutely nothing fancy for this look, nor did I do anything that is overly complicated. It was also super cheap.
Here’s what I did:
The bruises and the eyes:
I used a blend of four eye shadows, all from the same Coastal Scent eye-shadow palette from (88 colour palette). It’s an inexpensive palette, and it’s good for costume make-up or for when you need a color you seldom use at other times. Some of the colours are pigmented and great (such as the red) and some barely stain (such as the black).
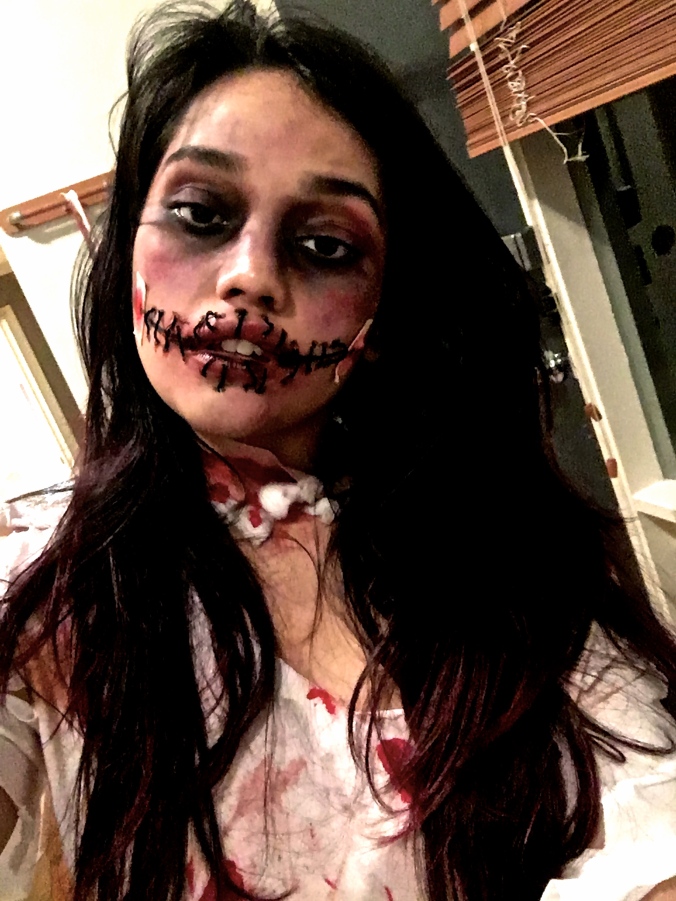
The colours I used are the purple, blood red, black and royal blue and I only used my fingers. I started off my applying the black shadow on the inner corner of my eyes, under my eyes and on the top of my eye-lids. I then applied the blue and red eye shadows in the same areas, however when using the red eye-shadow, I blended it down to my cheeks. I blended it out futher using the purple and a little bit more of the black. I continued blending until I thought I had acquired a bruised-ish look.
The stitched up mouth:
 This was actually quite easy to do. I started off by taking a black liquid eyeliner (Maybelline master precise) and drawing a smile that extends upwards from my lips. I also put a little bit of the eye liner on the center of my bottom and top lips. Next I applied a deep red lipstick (from Make Up Store) on my lips and smudged it unevenly with my fingers. This was all that was required for the base of the lips – it’s a messy look so just smudge it well and you’re good.
The next thing to do was to create the “stiches.” I took black threads, (thick, such as knitting threads) cut them up into 1.5cm to 2cm (1/2 inch) (approximate) pieces. I used eye-lash glue to stick them across my drawn on smile and (again, I did it unevenly). To make sure that I was still able to talk, eat and drink after I had done my makeup, I did not glue the threads across my actual lips. Each “stitch” was placed either on the top lip OR the bottom lip. For example, to create a stich above the lip, I used the end of a thin paintbrush to place a dot of eye-lash glue above the top lip line and on the top lip itself. I then used a piece of thread to connect the two dots.
Once the dots of eye-lash glue had dried, I applied a small amount of black liquid eye-liner and red body paint on those spots. This was to make them look more like wounds.
Finally, I cut up two small pieces of sticky bandage and put them at the ends of my drawn on smiles. I applied a small amount of red body paint, blended with a little bit of black liquid eyeliner to make it look like there was blood seeping out of the bandages.
The skin
As I had used my fingers to do most of my make-up, my hands had become rather messy by the end. Instead of washing them right away, I smeared the make-up that remained on my fingertips all across my face and blended it out. This gave my skin more of a gray (dead) look.
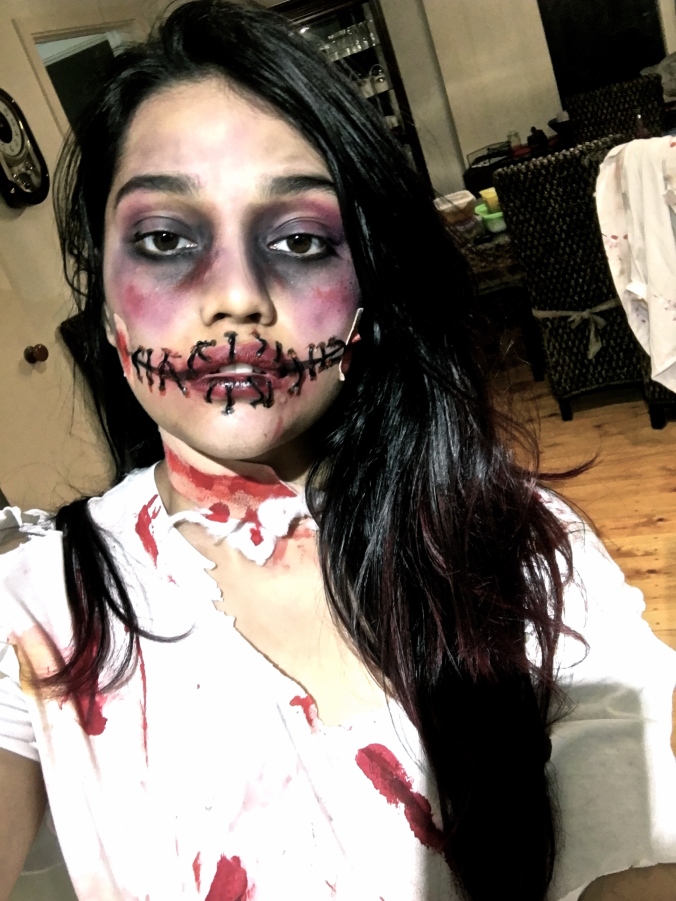
The neck:
I dropped a few drops of red food colouring on cotton balls, placed them on my neck and kept them in place by using a strip of sticky bandage. I then applied red body paint and red food colouring on the bandage itself to give it a bloody appearance.
The T-shirt:
I made this out of a $3.00 t-shirt, some (poster) watercolour, red food colouring and red body paint.
First, I tore up the t-shirt using a pair of scissors. There was no pattern here, I just randomly cut out bits and pieces.

For the colours: I used my fingers to smear bits of red, brown, and yellow paint across various parts of the t-shirt. I then applied water on those parts, bundled the t-shirt in a ball and really rubbed the surfaces together so that the paints blended and the t-shirt looked messy. I then took some red body paint, mixed it with some red food colouring and applied streaks of it across the t-shirt with a large paint brush (to give the look of fresh blood). I bundled up the t-shirt again and rubbed it so that the paints blended. I basically took a bunch of colours, mixed it together and had fun.
Naveed’s look:
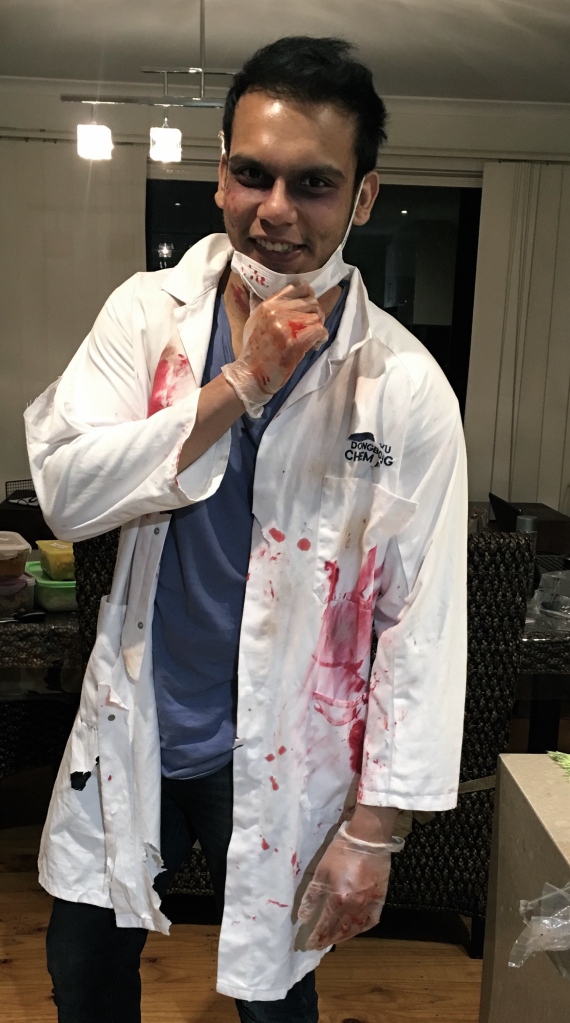
His look was super easy and took 5-10mins to complete. I applied the blue, black, purple and red (small amount) eye-shadows under his eyes in order to give him dark circles. Next, I applied little dots of red body paint on the sides of his face on in order to give the appearance of dried blood splatter.
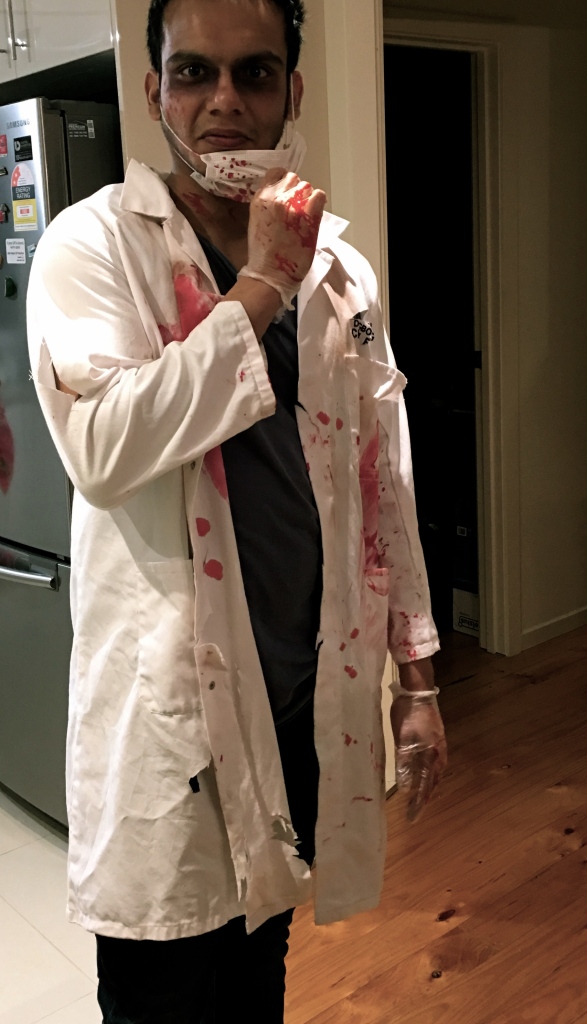
He had a facemask, on which I applied streaks and dots of red body paint to give the appearance of bloodstains. He also had a lab coat (he’s a chemical engineer, so he just had that stuff lying around), which I cut up and smeared red paint all over. I also covered the palm of my hand with red paint and dragged a print of my palm across the coat in order to make it look like a bloody hand had tried to grab onto the coat.
Finally, he put on a pair of disposable gloves. I applied drops of red food colouring on the gloves, which stained the gloves and made them appear bloody.
And that was it! We were ready to go
